Showing posts with label kids clothes. Show all posts

Thursday, February 13, 2014

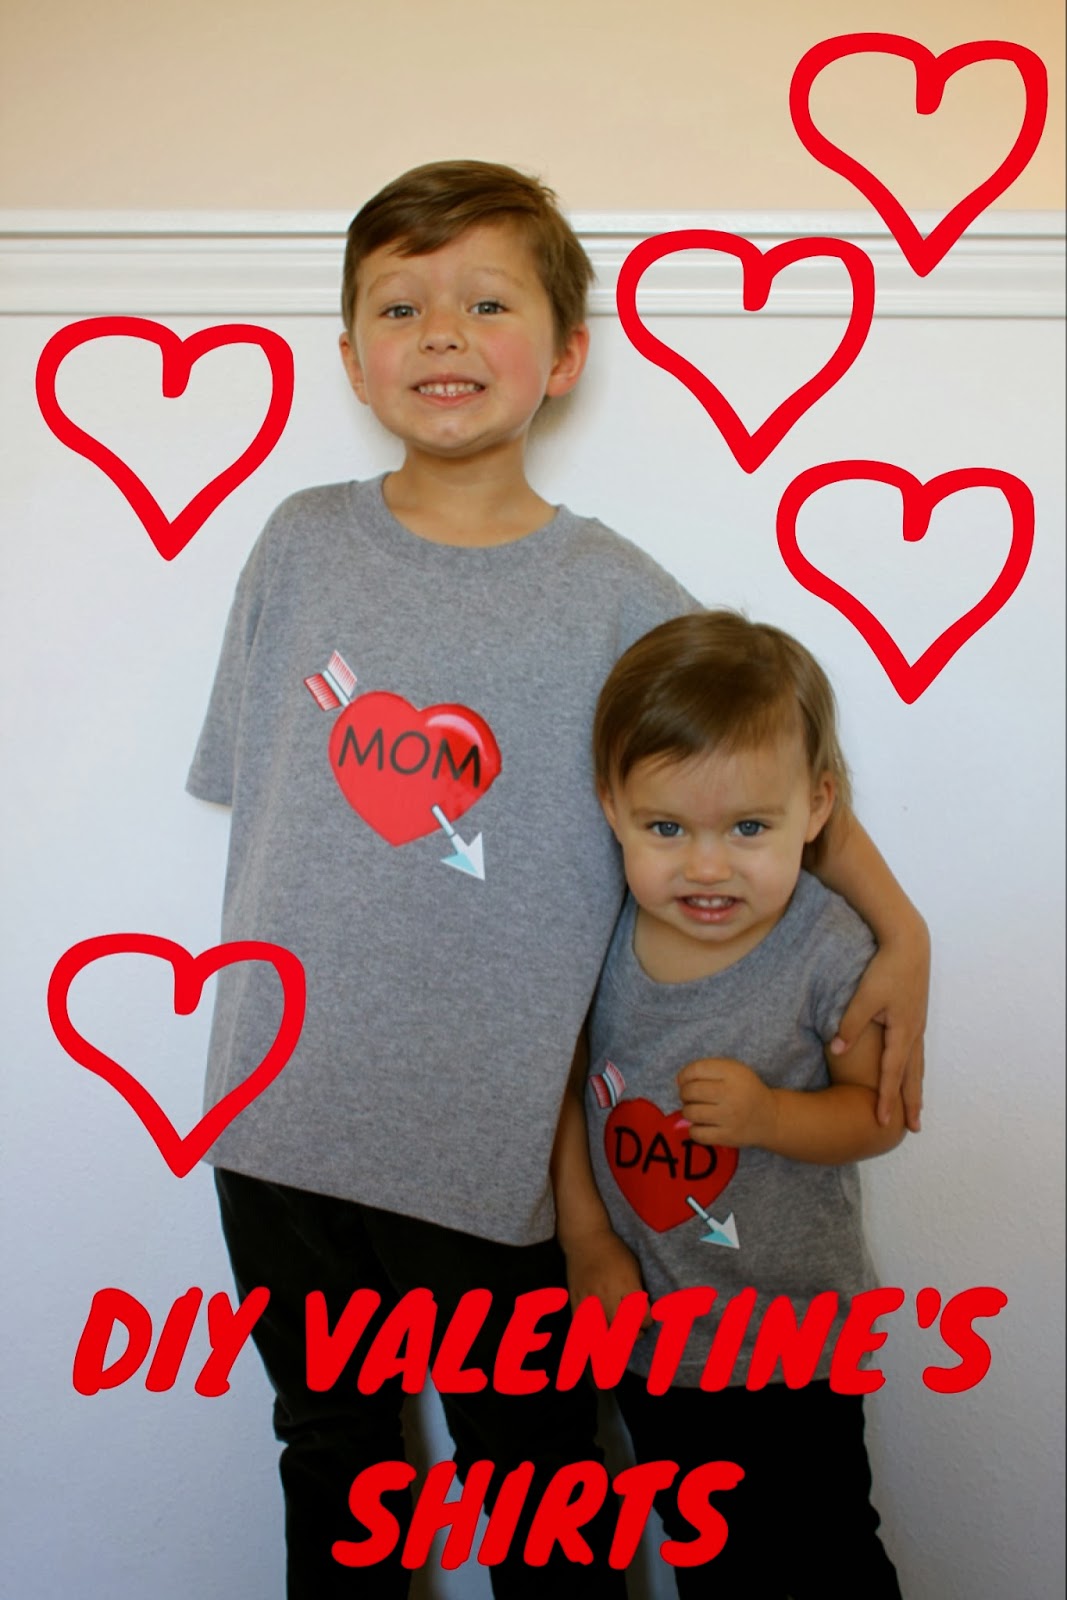
I {Heart} Mom and Dad Shirts!


I've had an idea to make my kiddies some Valentine's shirts for a few weeks now, but of course I put it off!  Luckily, this project is so simple, fast, and easy that I was able to get them done while Will was at preschool this morning, and just in time for Valentine's Day tomorrow!  So, if you want to make one, don't fret, you can get it done in practically no time at all!!!

So, here they are: I {heart} Mom and Dad t-shirts!  A little narcissistic on my part?  Maybe, but they look so cute, and it just makes my heart sing to see them wearing them that I can't help it!  Of course, you could create an image saying whatever you'd like, in case you're not as narcissistic as I am :)

Want to make one too?  They're super easy.  You just need a plain t-shirt; this morning I ran to Joann's to grab a couple of plain grey t-shirts (so, obviously, if you have shirts on hand that you can use, this project would be even quicker and cheaper!).  Joann's sells tees for about $4.50, plus I had a couple of coupons, making it so each shirt was only a couple of dollars each.  The only kicker was that Will's shirt (youth size small) was the smallest they carried, so I had to buy Clara's in that size and do some quick resizing with my sewing machine when I got home.  No big deal, but you could definitely save yourself the hassle by just going to Target and getting the right size in the first place!  Anyway . . . I'm kind of digressing here.  You will also need some iron-on t-shirt transfer papers (pictured below--I got mine from Target a while back for Will's Paw Patrol birthday party), a computer, scissors, and an iron.


Here are the simple steps:

1.  Pick out an image online, or create your own image.  I just found a simple heart and arrow image and then added the words "mom" and "dad" to them.  

2.  Print out your image onto your iron-on transfer paper according to the directions on the package.

3.  Cut the image out and peel off the protective backing from the back of your image.  

4.  Iron the image onto the front of your t-shirt according to the instructions on the package.  *I also recommend putting a rag between the image and your iron to keep the image from sticking to your hot iron!*

5.  Admire your cute kiddies expressing their love for you on the front of their clothes for all to see!!!  


Trying to give thumbs up :)


Sending love and hearts your way this Valentine's Day!


Tuesday, January 28, 2014

The Easiest Fleece Scarf You'll Ever Make


Before we went to Utah for Christmas, I knew that we needed to up our winter clothes game.  Living in San Antonio, our kids just don't have the winter clothes that they would have if we were still in Utah.  The weeks that we were there, the weather was in the 20s and 30s.  That's cold!  Especially since we've been living in and getting used to the warm weather in Texas.


I had some extra fleece in my stash and so I thought I would make a couple of simple scarves for my kids.  And they were even quicker to make and more simple than I expected!  A tutorial isn't really needed, but in case anyone reading is a beginner to sewing, here are the simple instructions:

Supplies Needed:

1/2 to 1 Yard of Fleece (depending on the width; if it's 44" wide, you'll need 1 yard, if it's 60" wide you can probably get by with 1/2 yard)  *You could also use flannel, cotton, or cuddly-type fabrics like minky*
Matching Thread
Scissors and Measuring Tape
Sewing Machine

Tutorial:

1.  First, you'll want to decide on your scarf length and width, depending on for whom you are making it.  For my 4 year old son, I made his 48" long and 5" wide.  And for my almost 2 year old daughter, I made hers 38" long and 4" wide.  Obviously, if you're making a scarf for an older child or adult, you'll want it to be quite a bit longer, and perhaps wider as well.

2.  Cut two pieces (front and back) of your fabric to the aforementioned size.  Be sure to add 1/2" all around for seam allowance.  So, for my 4 yr old's, I cut the fabric 49" long and 6" wide.  And for my smaller scarf, I cut it 39" long and 5" wide.

3.  Put front and back pieces right sides together and pin the edges.

4.  Sew around the edges, leaving a 4-6" gap not sewn.  While I was sewing the short ends of my scarves, I decided that I wanted the ends to be rounded, so as I stitched, I sewed a rounded edge instead of going all the way to the corners.  Either way would work just fine though.  Once it's all sewn, turn the scarf right side out through the gap you left open.

5.  Whipstitch (by hand) the opening closed, or if you're lazy/don't mind if you see some stitches, tuck the raw edges under and sew the opening closed with your machine.  I took the machine/easier route because I was using a thick fleece.  Because of its thickness, the stitches where I sewed the opening closed are hardly visible at all.  It's all a matter of personal preference though!  You could always topstitch around the entire scarf as well if that's a look you'd prefer (I would probably recommend to do so if you're using a cotton or flannel fabric.  The topstitching will help the thinner fabric to maintain its shape.)  But, really, just do whichever method you prefer!

And that's it, you're done!  Easy peasy!!!


I'm really glad I took the 20 minutes to make these scarves--they really paid off in the cold Utah temperatures, and we've actually used them a time or two here in Texas as well since we've been home.  Both the lengths were just right for my kids--not too long, but still long enough to wrap around their necks twice and tie in  a loose knot so they wouldn't come undone.  While we were in Utah, we spent a couple nights outside seeing the Christmas lights at Temple Square and at Hogle Zoo, and with the below-freezing temperatures, I'm glad my little ones had that extra layer around their necks to keep them warm!


So, go ahead--it's not too late this winter to make your own fleece scarf!


Tuesday, December 17, 2013

Christmas Time Happenings

With December flying by, I feel like I just haven't had a chance to document what we've been up to . . . but trust me, we've been doing a lot!!! So here's a quick recap of our Christmas time happenings:

I've been doing lots of sewing! I tried to get our Christmas advent calendar done right at the beginning of the month. I was going for kind of an old-school look, and I wanted to Will to be apart of the process, so I let him choose some of the fabric for the pockets (ahem, goofy-looking reindeer wouldn't have been my first option, but he loved it, so we went with it!). And to make it easier for myself, I just bought stick on felt, pre-cut letters and numbers from Hobby Lobby. It's been fun for the kids to look for little treasures each day this month, although many of the pockets were prematurely emptied by a mischievous little 20 month old . . . :)


I also whipped up a little Bimaa top for Clara, which I absolutely LOVE!!!! That cowl neck just kills me. I'll definitely be making a few more :)


Please ignore the candy-filled mouth and runny nose!

I've also been working on some spiderman Christmas jammies for Will, a little buckle-purse for Clara (that Santa will deliver on Christmas morning), a couple of fleece scarves for both kids, and another Christmasy top for Clara! I'll be sure to share those projects after Christmas :)

Putting up our tree! When we went to pick it up, Will immediately decided on a particular tree and really wanted it to be "the one". So, we went with it, and it turned out to be the perfect little tree! He has an eye for Christmas tree hunting I guess :)


Here Will and Clara are admiring their tree-trimming work. 


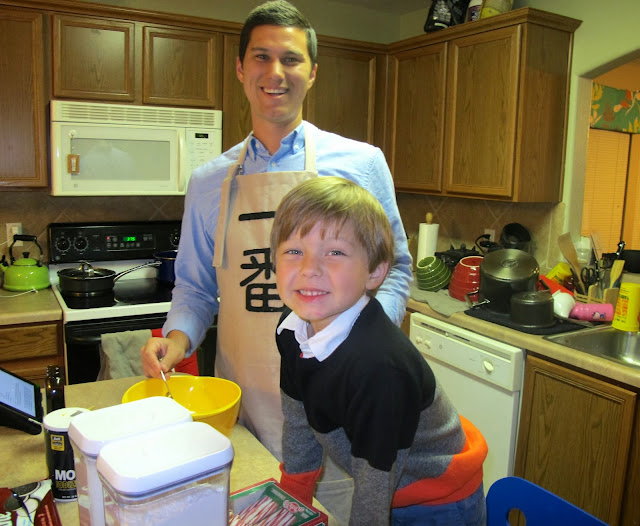
We've been doing lots of Christmas cookie-making! In this first two photos, Will and Peter are working on Peter's mom's candy cane cookies that they make every year. And in the next two, Will's whipping up some good ol' sugar cookies (with some help ;)).


Visiting Santa. We've actually visited four Santas this season! First at the mall with a fun playgroup, then at Bass Pro Shop (their pictures are free!), at the zoo, and then at our Church Christmas party! It's been quite funny to see the kids' progression with becoming more comfortable with Santa Claus. At the mall, Clara was screaming bloody murder and I could hardly calm her down, and Will wouldn't sit on Santa's lap; he was content just to stand close enough for him to hear what he was hoping to get for Christmas :) But, then here, by our Church's Christmas party, both kids happily sat on Santa's knee! Success!


And, when we haven't been out shopping, sending Christmas cards, and wrapping presents, we've managed to see the lights and enjoy the festivities at the San Antonio Zoo and Sea World!


We hope you're all having a wonderful holiday season as well! On Saturday we're off to continue the celebrations of the season with Peter's family in Utah (brrrr)! If I get a chance, I'll try and post a couple more projects before we leave, but if not, Happy Holidays and I'll see you in the new year!!

Thursday, November 14, 2013

Another Top for Clara

After making Clara's striped recess raglan 3/4 length tee, I was anxious to make her a long sleeved version as well. It's such a simple and great pattern that I think this will actually be the second of many more to come! And I like the fit of the long sleeve better on Clara. Again I made it in a size 2T and I got the cute vintage-y looking floral print from my local Joann's. Yay Joann's for recently having more of a selection of knit fabrics!!! And even though she's not showing it, I'm pretty sure Clara likes her new shirt as well :)


Wednesday, November 6, 2013

The Recess Raglan for Clara

I must be nesting, because lately I've been on a big sewing kick. I got this cute striped knit fabric 50% off from Joann's and decided it would be perfect for the Recess Raglan for Clara. I haven't sewn very many knit tops before, and I was really happy with how easy and quickly this one came together. I sewed a 2T in the 3/4 length sleeve version with the band around the sleeves (although you can't really tell because I couldn't get Clara to drop that ball for the pictures!). It's a little big, but still wearable and she'll be able to grow into it. I can't wait to sew a long sleeved version for Will for this winter!


Thursday, October 24, 2013

Girls Harem Pants Tutorial

I've been loving the harem pants trend. Especially on little girls. I think the baggy bum is so cute and just looks so comfy! So, I decided to make my little Clarabelle a pair. There are a few things I'll do differently next time, but for the most part, I love how they turned out! Want to make a pair for your own little trending diva? Or even for yourself? Follow my basic tutorial and you'll be able to make a pair in any size! By the way, this is a great beginner project for sewing with knits! Because of all the bunching and looseness of the pattern, it is very forgiving, so give it a try!


Before we start, here are a couple of tips for sewing with knit fabrics:
-If you don't have a serger (I don't and it doesn't stop me!), be sure to use a zig zag stitch, or another stitch for sewing with knits as designated by your machine. I just use a basic zig zag stitch and it works great.
-On that note, I like to make my stitch length a bit smaller and my tension a little stronger when sewing with knits. For me, this has proven to move my fabric through the machine a little easier. You may want to play around with your stitch length and tension on a piece of scrap fabric first to see what works best for your fabric and machine.
-A lot of people recommend using a ball point needle. I have done this occasionally, but I usually just end up using my basic, all-purpose needle because I always forget to switch it! Both have worked fine for me.
-Don't pull on your fabric as you're sewing! Let it feed through the machine on its own (unless you're stretching it on purpose, like we will later when attaching the waistband). This will prevent your fabric from getting stretched out while you sew.

1. Trace your pattern. I used a pair of basic leggings to trace that I could then modify. I like to use parchment paper for my pattern tracing, but any paper would do just fine.


2. After tracing the pants, we'll need to modify them now. (Since this was the first pair of harem pants that I've made, there are a few modifications that I'll make next time, so I'll mention those as we go along.) First, you'll want to extend the bum space. I did this by adding 3 inches straight out from the crotch. 

**Here's where I would do something different next time. At this point, I also recommend dropping the crotch about an inch or two. So, next time, I would lower the crotch 1-2" and also extend it out 3".

Next, to account for the ankle cuffs and band on the waist, you may want to make the adjustments now. I took about an inch off of the top, but again **next time I won't. This will help to add more of the dropped crotch look. I also shortened the length 2 inches because we'll add the cuffs later. (In the pictures you'll notice they're kind of baggy around Clara's ankles. I made them a little long so that she will have some room to grow. If they were exactly the right length, they wouldn't be baggy.)

Below is my pattern traced, with the dotted lines indicating the adjustments. Cut your pattern out along your dotted lines.


3. Next, cut out your cuffs and waistband pieces. For the cuffs, I just used the piece from the pattern that I had cut off below the dotted lines. I also took an inch off of the width so that they would be tighter around her ankles. Once you have your pattern cut out, fold your fabric twice (the bottom and one side of your pattern should be lined up on folds.) This way, once your fabric is cut out and unfolded, it will be twice as long and twice as wide.


For your waistband, measure the size of your child's waist. If you're using a knit that has a small amount of stretch, I would cut your piece to the exact measurement. That way, once you've sewn it on with seam allowances, it should stretch to just the right size. The fabric I used for Clara's pants, however, has A LOT of stretch. It's very thin and has a 4-way stretch. To account for this, I decided to cut her waistband 2 inches smaller than her waist. 

The height of the band will depend on your preference. I wanted the band to be about 2.5 inches once it's folded over, so I cut it to be 6 inches tall (so that once it's folded over and then stitched on it would end up being about 2.5 inches.) In case you're wondering, Clara is 18 months and her waist is about 18". So, my measurements for the waistband were 16" wide by 6" tall.


4. Cut out your pants pieces. Place the straight edge along the fold of your fabric. Cut two of these pieces.


5. Once your two pieces are cut out, unfold them and line them up with each other, right sides together. Pin the two bum seams together and sew along these two sides.


6. After you've sewn the bum seams, line the seams up. Your fabric should resemble very wide pants now! Pin the inseams together, making sure to line the center seams up first. Sew all the way around where you've pinned.


7. Now it's time to sew the waistband and ankle cuffs into bands. Fold your pieces so that the short ends are matched up. Sew along these ends.


5. Now we'll attach these bands to the pants. After these bands have been sewn, fold them in half so that the raw edges are matched up. (Right sides out.) Keep your pants inside out and place your first cuff inside one pant leg, so that the right sides are together and inside seams are matched up. Pin in place. *If you made your ankle cuff smaller like I did, make sure to stretch your cuff evenly as you pin it to the pant leg.* Sew along the raw edges, making sure to pull your cuff band taught as you sew. Repeat this step with the other leg and with your waistband.

**The smaller your waistband is compared to the width of your pants, the more you'll have to stretch the waistband fabric as you sew. Pin it evenly and then sew slowly and you should be able to get nice, even bunching of your fabric where your waistband meets your pants.


6. You're finished! Admire your work and try them on your lucky little model!


Will's hand made a small debut here! He was trying to show Clara where to stand for the picture :)